Thursday, September 15, 2011

Dior Velvet Eyes

Dior Backstage Eyeliners-To-Wear Multi-Wear Adhesive Eyeliner Patches
Exclusive, limited edition
Available at Sephora Sept. 16th
$59.00 us


I know what your thinking $59.00 for stickers!!!  It comes out to a little under $15.00 per set. Hey, good false eyelashes can run you about the same, so it really depends on your willingness, and budget, to spend the money on these. With this product I feel you are paying more for the name attached to it, (and maybe a little for the concept since it's pretty new) and if your like me you could care less about the name, and more about the quality of the product.

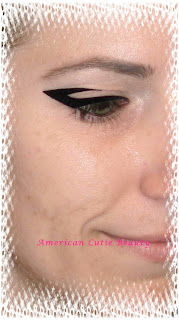
These beautifully crafted velvet-like and Swarovski crystal encrusted eyeliner patches are pretty interesting. They are reusable stickers, FOR YOUR EYES!! How awesome is that! What intrigued me about these the most is they are a no mess, fool proof way to get dramatic eyes without the mess of mistakes. They give sharp lines and are easy to remove if you put them on wrong! The pack comes with four different styles. The top two pairs are made out of black velvet-like material with nothing else on them, the third pair is covered in tiny grey crystals over a black lacquered finish material, and the fourth pair is covered with fine black sparkles over a black lacquered finish material with three tiny white crystals on the wings.


Dior Velvet Eyes come with glue for multiple usage. However, the glue wasn't needed for the most part for the first use. These puppies have great adhesion to the eyelid which is great, the only part that needed a little more STICK was the smallest inner part of the patch. After the first use they are less sticky on their own so that's when the glue comes in. I don't know how many uses these can withstand since I've only had them for a week, but for the price I'm hoping to get them down to $3.00 per use! haha 


* Warning* If you have sensitive eyelids taking them off felt a little like I was waxing my eyelids haha but not too bad.

These are just like applying false eyelashes so if you have a hard time with false eyelashes these will be a challenge too! I found the easiest way for me to apply them was, with a half open eye, holding them with tweezers on the upper middle part of the patch while placing them and then lightly patting them onto the eyelid with my finger starting from the center of the patch working my way to the inner part of the eye then to the outer wing. Don't get them too close to the eyelashes, but try to get them close enough, you can always fill in the rest with black liner (I wouldn't recommend liquid) but a pencil, paint pot, or shadow will work better for cleaning purposes. When I got them too close to my lash line it felt like my eyelids were being pushed down closing my eye. If you get the angle wrong the first time, or second or third like me,  just pull them off and retry... That is the best part about these is if you mess up you don't have to use a makeup wipe!

The feel of these on my eyelids was a bit uncomfortable. They are heavy, and if your eyelids fold over like one of mine does it will catch onto the fold and not go flush with your skin. These are not for everyone and more for the person with perfectly shaped almond eyes, but can still work for you if you don't mind where the wing line angle is pointing since the inner part of the patch must follow an already specified angle along your lash line. These are not great for all day wear unless your Kat Von D and like the bold jet-black eyeliner look all the time. While wearing them I felt like my eyes were being taped open in some cases which caused my eyes to dry out and start to water. Other times I felt like my eyes were being pushed closed and it affected the shape of my eye line, also my vision. I did get use to the heavy feeling of the thinner patches but the odd looking pair in the top of the pack I just couldn't get use to at all. They all vary in size and some may be too big for people with smaller eyelids. Mine are fairly small but I didn't find this to be too much of a problem.

After applying the patches you can put your eyeshadow on since you need to apply these to clean, dry eyelids (which I found that it's okay to put a primer on first, I used Stay Don't Stray, by Benifit and also Nars eyeshadow primer) Although, this can shorten the length of the patch's life since the glue side will start to get gunky faster, so it is recommended to not use eye shadow primer unless you plan to put shadow on along with the liners. Cleaning the patches was simple. After removal I took a slightly damp cloth and with a light touch wiped the front side clean. While they are still on your eye you can take a damp Q-tip to remove any shadow that gets on them. You can clean the pair with the fine black glitter on them the same way. I found that a couple pieces of glitter came off when I cleaned them which didn't matter at all. I have yet to tackle cleaning the sticky side since I have not used them more than two times.


They can also be used like stencils. Apply the patch then apply your makeup. Remove the patch after your done with your eyeshadow and you have a perfect shape to trace and fill in with liquid eyeliner. 


I got the right patch as close as possible to my lash line and it felt and looks like I have a droopy eye. haha


This pair I fell was the easiest to apply.


 This pair is probably the most universal of all the patches since they are not too thick.


I liked these the best, just because they have a little bling to them and are not too think.


I hope this review was helpful to you. Since everyone has different eye shapes these won't work for everyone and wont look the same on everyone. They take a little work to apply and a little getting used to the heaviness. I find these can be a lot of fun for people such as myself who want dramatic black eyeliner eyes with no liquid liner skills!

After reviewing them though I don't think I would have purchased them since my eyes do not have the right angles for them. It's a great concept but still needs a little more work for people without perfectly shaped eyes and sagging eyelids. haha.

So what do you think?
Do you think wearing two different eyeliner patches will catch on haha!


Have a bold eyeliner day,
Your American Cutie Beauty

Thursday, September 8, 2011

Simp-Lee Makeover!

Over the Labor Day weekend my friend Lee came to me and told me I could clean him up! YES, YES, and YES. Luckily I had two lovely ladies to help me out with this task, Alison and Roxy.  Roxy is a seasoned Lee trimmer so he was in good hands! And Alison has an eye for what looks good on guys! I have been cutting my hair for years and have recently been trimming my roomy Joe's hair. I must have done pretty good the first time on Joe's hair cause he let me do it again! I even got a tip! haha But the confidence was there to take on this task. I really should have gone into Cosmetology cause I LOVE Hair and Makeup! 


Let me start out with saying that our friend Lee is one of the sweetest guys out there. He will do anything you ask, (and don't ask...) and is very dedicated to his friends and family.  He is a computer gamer that enjoys playing Cribbage, WoW, and MUDD.  I believe he is studying Accounting in collage too!

What we started with was the fluff on his face. This man has a FULL beard that Vikings would be jealous of! But since we don't live in the Viking age any more it had to go! We took his mustache and beard around his mouth down to a 2 on the clippers and trimmed it up nice and neat for a respectable beard, I don't know what you would call this bearded area but it looked great! The rest under his chin and up to his sideburns were clean shaven! Looking fabulous!

For the hair on his head I was going to trim it short with about three inches left on the top but someone else had a better idea. So what we did was left all the length on his hair which reached about to his chin and a little longer in the back so he can easily put it back into a pony tail for easy management. In the back from the ears down I graduated from a 3 down to a 0 and trimmed and cleaned the neck area to help keep him cool.

Warning, I wish I had better after photos but it was late and dark when I thought to take them and don't do the end result justice.


I think he looks so handsome now with a clean trim beard and face! Now to get him to come over every two weeks to do maintenance! =) Hint, hint, wink, wink... Lee!~ 

Thank you to Lee for letting us clean you up and Thanks to my wonderful friends Alison and Roxy.


Have a great day from your hair clipping 
American Cutie Beauty

Thursday, September 1, 2011

Dior Backstage Eyeliners

Dior Backstage Eyeliners-To-Wear Multi-Wear Adhesive Eyeliner Patches
Exclusive, limited edition
Available at Sephora Sept. 16th
$59.00 us 


My first Dior purchase... Am I in trouble??? haha Since I am bad, and I mean REALLY bad at applying liquid liner and really any kind of liner with any shape needed I figured these might be worth looking into. Since I am a VIB member at Sephora and had a 10% off coupon I decided to try these puppies out before they go on sale to the general public September 16th. I should be receiving them soon and even though they took up my entire makeup budget for the month.... =(  I hope to have a good review out for you before they do go on sale so you can have confidence in your purchase.

Sephora's description says these are reusable velvet eyeliner appliques like a sticker or transfer tattoos with finishes ranging from matte and shiny black and designs from simple black to anthracite grey and Swarovski crystals.

I am really excited to try these out. Look back next week for a full review.

Here's the review, enjoy! Dior Velvet Eyes

Have a great day from your sticker loving fake eyeliner,
American Cutie Beauty

Wednesday, August 31, 2011

Estee Lauder Bronze Goddess Eyeshadow Pallet

Estee Lauder Bronze Goddess Eyeshadow Pallet
$42.00 Sold out at Estee Lauder

Back when I was younger I had a bad reaction to Clinique and Estee Lauder products. Since then I haven't touched their products! Big mistake that I have learned is that just because you had a bad reaction to one product in a makeup line doesn't mean you are going to have that same reaction to all of their products. So I broke down and purchased the Bronze Goddess Eyeshadow Pallet by Estee Lauder from their 2011 summer collection. Best decision I have made! No bad reaction, so far and I have worn this beautiful pallet several times already!

Moral of the story, don't be scared of a product line because their makeup remover made you breakout, because their eye shadow might just look great on you with no bad reactions! Just make sure if you do have allergies to certain ingredients check the label!


This pallet is AMAZING! it comes with six colors that all work together brilliantly! The quality varies on the colors. I have found that the Silver White Metallic Champagne color on the far right is hard to work with. It is chunky and pressed in there very well and doesn't give much color payoff unless its wet and even then its hard to get it to shine. The Bronze Rose with Gold Shimmer has a really nice texture and good color payoff. The Pinky Peach Gold almost Metallic color is so pretty, great color payoff and super easy to work with. Probably my favorite out of all of the colors. The Teal has an ever-so-slight silver shimmer too it but is mainly a matte color. Great payoff wet, and works well with blending into the other colors dry. The Bright True Gold  has a metallic shine to it and gives a great color payoff and easy to use. The last color the Dark Mossy Green with Silver Shimmer is a great color for the crease. It builds well and can get very deep, so pay off is good, and it blends well.

All of these colors work fabulously together. I would have to say this is a great pallet to carry around with you and you really need no other if your tight on space.  You can create a light going to the beach look or a super smokey eye for night. This pallet is an all-around great buy.

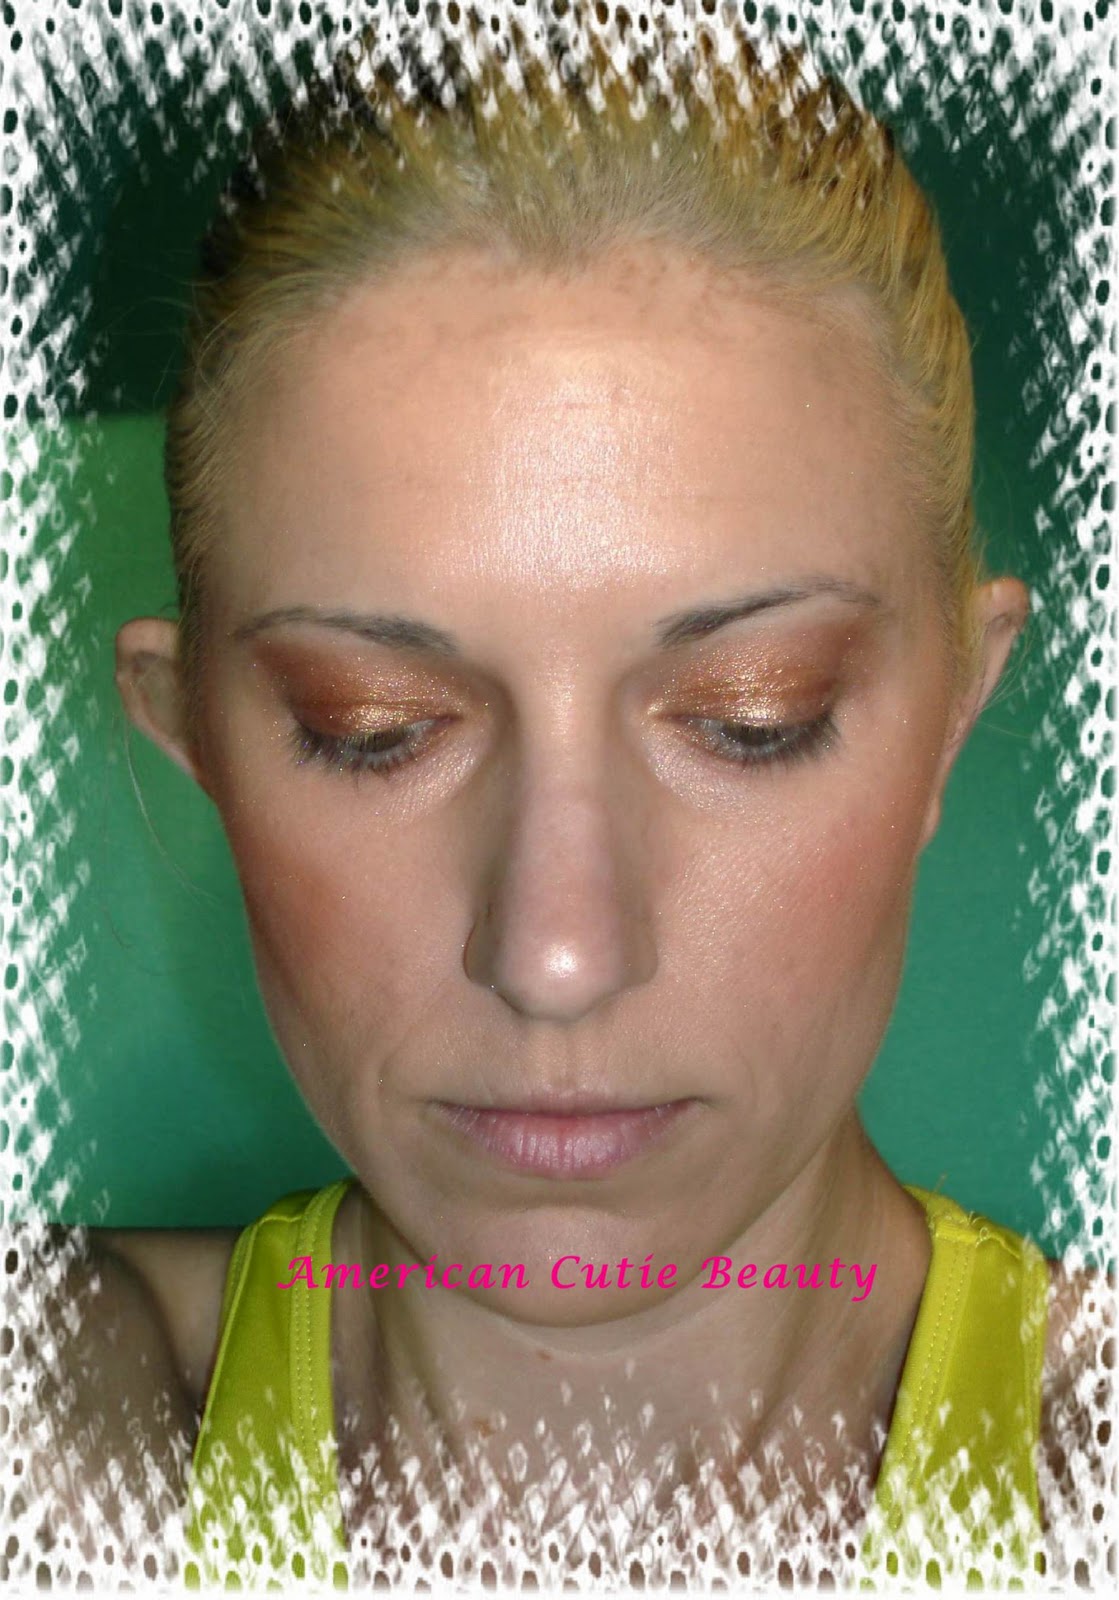
I wish I had done swatches but have been so busy lately with other life obligations. I at least have a picture with using all the colors! =) 


Have a Bronzed Goddess day to all my beauties!
Jamie Fox

Tuesday, August 2, 2011

Captcha...

So I was informed last night that my blog-diggitty was having a problem with it's captcha box which is the "Type in these random you can barely see letters to make sure your human" box for commenting.... Please try and comment now if you've tried and wasn't able to before. Comment so I know I actually get any.. ha ha

Your American Cutie Beauty
Jamie Fox

Friday, June 24, 2011

Hair Dreams ~ To extend or not to extend

With all these celebrities changing their hair day after day from natural to adding 6, 9, 12 inches to their already fabulous hair with removable and semi permanent extensions really make extensions very alluring. A woman's hair is one of the sexiest things to a guy so with all the options a woman has she can't help but wonder... To extend, or not to extend?

Have you been wondering the pros and cons of extensions? Whether it is the removable day-to-day extensions or even the 3-6 month semi-permanent ones, I have some of your questions covered! It started out for me three and half years ago when I had a vision of long flowing hair at my wedding, but at the time my soon to be husband proposed to me and we set our date there was no way my hair was growing, 20" in 6 months! ha ha , no way! I had tried the removable extensions already and wasn't too thrilled with them so it was time to see how semi-permanent worked.


Removable extensions.

The removable extensions are very easy to use once you have taken them to a hair stylist. They will show you how to attach them and most importantly put them in, hide them and style them so they are not too blunt and fake looking. They will work them into your natural style that adds the length and thickness you are looking for.


The Pros on removable extensions.
~ Easily removable
~ Quick look change from day to night or just day to day.
~ WAY LESS EXPENSIVE! These can run you about $60 plus whatever the stylist charges for cut and style.
~ Less maintenance in taking care of the extensions.
~ You can dye your hair whenever you want.


Cons
~ It adds about an extra 10-15 minutes to your hair routine.
~ Difficult to wash.
~ Hair styling is limited. You need to make sure they do not show.
~  They can fall out at the wrong time if not secured correctly.
~ Color matching is a little harder if you have a color weave.
~ Difficult to style while in since slipping can occur.

Semi-permanent


Whether you choose to get the ones that attach with metal clips, or the glue bonds, they are in there for 3-6 months depending on how much care you put into them! The metal clips are a little more damaging to your natural hair. The glue in ones, which was my choice, are less damaging to your hair and can be glued back in if they happen to *opps, slip out! Yes, no matter what kind you get over time some will come out. I only had about 3 come out. Since I did not try the metal clip kind I do not know if they are able to be put back in, but the glue bonded ones if they come out are easy to put back in with a hot iron. When you first get them they might be uncomfortable at first, but the tightness will go away in a couple days and you get used to the extra weight.


The PROS on Semi-permanent extensions
~ No time to put them in everyday, they are there when you wake up.
~ Look completely natural.
~ Easy to style, just be careful.
~ You have the ability to intertwine several different shades to match your natural hair.
~ Once they are in, they are in, no need to mess with them every time you want long thick hair.
~ More hair style options.
~ You can style it,wash it, and cut it easily.


Cons
~ A lot more maintenance.
~ When styling you must be careful not to get hot styling appliances close to the bonding point.
~ Brushing your hair gets a bit harder at the bond point as your hair grows.
~ You must wait till you get them taken out to re-dye your hair!
~ It's recommended to braid your hair or put it in a loose pony tail while sleeping.
~ COST! For the Hair Dreams brand I had, it cost about $1800


Naturally long hair


Now that I have had the experience of removable, and semi-permanent hair extensions I have opted for real hair. My hair is not as long as it was while having the extensions, but I am about 3 inches shy of that length! It may have taken a couple years to get my hair this length but it has been worth it. I still go through the want for extension to thicken my hair but enjoy the ability to do ANYTHING with my hair, how I want and when I want. But no matter how much I miss my short hair I love the style rang I have with long hair.


The PROS on real long hair
~ It all mine.
~ I can dye, cut, style, brush, anytime and how every I want.
~ Easy to manage.
~ Low maintenance.
~ FREE!


Cons
~ There is a lot of it. haha


Final thoughts on to extend or to not extend. I Loved my Glue bonded extensions! I would do it again in a heart beat if I had the money. They made my hair long, thick and looked natural. Removable hair extensions are fun to change up a look every now and then but I don't care to mess with them unless it is a crazy color. I enjoy my natural long hair. It is easy, carefree, and all mine. So out of the three you can choose for yourself and I hope my pros and cons have answered some of your questions on hair extensions. I know I have missed some things so please ask questions if you have any more.

With lot of long hair and love
Your American Cutie Beauty

*~Jamie

Thursday, April 21, 2011

Fairydrops - Scandal Queen Mascara

Fairy Drops Scandal Queen Mascara
$24.oo us Available only at Sephora


Fairydrops Scandal Queen is available exclusively at Sephora in the United States and comes in black only. (But is available in different formulaes and colors in Japan)  It was originally created by a Japanese TV personality Aya Yasuda. It is a volumizing, water and sweat-resistant mascara with a unique patented in Japan applicator wand. The formula is infused with fibers to help lengthen and thicken that looks kind of like all of your little eyelashes are falling off and accumulating in the mascara tube. Not the case! ha ha,  The applicator is the most unique part about this product. The wand looks like like three fuzzy black pearls strung together and then curved in to hug your lashes. The brush is densely packed with bristles so coverage is super easy to get and with the unique shape of the drops, the round tip makes it easy to apply to your lower lashes. The outside packaging is super cute! Very Vegas style, bright, flashy, and fun! The tube and wand are very sturdy too.


I was a little skeptical about the formula and the density of the bristles. I haven't had much luck with denser wands but the spacing and shape of the wand really helps out. It is a little clumpy on the wand at first when removing it from the tube, just stick it back into the tube and remove the wand while rubbing the application side of the wand against the lip of the tube. Once you have a clean side to apply with, it goes on great! Every now and then because of the fibers in the formula you'll get clumps on your lashes. The formula takes a little longer than a couple swipes to dry so you have time to use an eyelash comb and remove any clumps (if any) carefully without removing the length the fibers have given.
(I like using Sephora's eyelash/ brow comb)

Fairydrops holds curl very well! It has about an 7 hour hold and for me that is HUGE! My lashes have NO natural curl... ha ha. If you find them starting to fall at anytime just a little touch-up with the old eyelash curler and they are brought back to life! The formula dries fully and non-tacky so whipping out the curler at any time works well and without the need of the eyelash comb after, for separation. It can get a little flaky after this but not every time. In terms of water and sweat resistant, I feel it does okay in that area, it doesn't smudge and is fairly easy to get off with makeup wipes or any facial cleanser, but I wouldn't say it is the best choice for summer time at the beach...ha ha if you wear mascara to the beach that is!

This mascara is a bit pricey but I really think it is a great product. It helps my short uncurled lashes come to life! It lengthens, curls and brightens the windows to my soul!

First Two pictures are without mascara or curling.
 Warning...please ignore the brows and lack of makeup in some pictures... ha ha 


The last four pictures have two light coats of Fairydrops and have been curled.

A special thanks to Noel for suggesting this product. If you have a product you would like me to review let me know.

Have bright eyed beautiful day!
Your American Cutie Beauty ~ Jamie

Monday, April 18, 2011

BeautyFix.com Winter Shipment

Winter BeautyFix, kind of disappointing. The selection presented to me left me wanting more. More than half the selections were available to me from the Fall collection and the new items were either samples sized or something I really don't care to try. My spring collection has arrived and I am a bit more excited to try the items I got this time. I was a little more pleased with the selection this time, but still did not get the chance to sample any of the makeup brushes they advertise as being items to review. They always seem to sell out before I put my order in, or just aren't apart of what they recommend for me. I do put in different beauty profiles to see what items are available to other skin and hair types so I don't miss out on any of the items, but I still am left wanting with BeautyFix.com.


Here is a list of items I received but did not have a chance to write a full review on.

Juice Beauty Oil-free Moisturizer
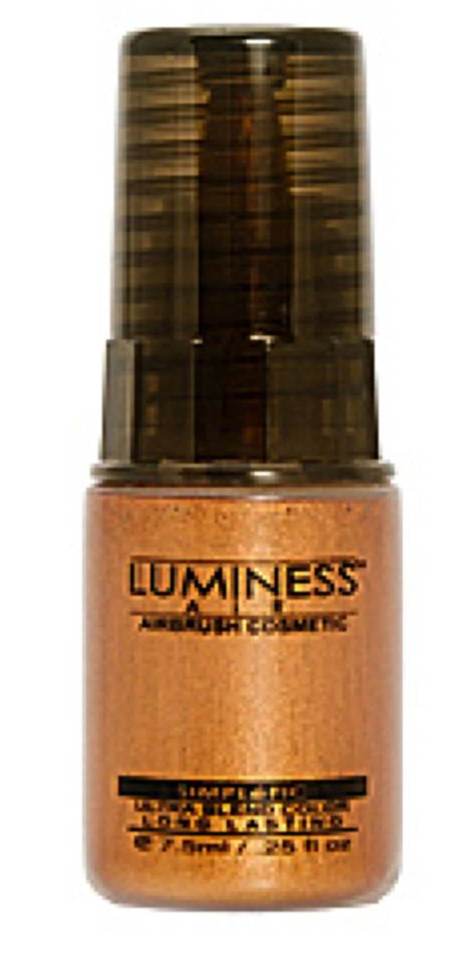
~ This is defiantly made for people with really dry skin. This was not a product for me. I have combo skin, but in winter I have dry skin, but this product just made me break out the very next day.

Juice Beauty Sensitive Green Apple Peel
~ I still haven't had a chance to try this out.

Splendide Mani Smoothing Hand Creme SPF 8
~ This stuff is awesome! Smells clean, and did a great job at moisturizing my hands. I also tried it on my husbands dry cracked feet and he really enjoyed it... shh don't tell him I told you. =) This stuff feels a little heavy on the hands and every where else you put it so it is more of a night time lotion. It doesn't feel watery at all and is thick and creamy. I would recommend this product to anyone looking for a good moisturizing lotion, for hours of wear.

Four Truffles Body Smoother
~ This stuff smelt great. It has a noticeable smell of lavender that didn't stay too long after getting out of the shower. It worked pretty well to smooth out my skin. I felt like silk when I got out of the shower and the day after too. The only down side to this, was in order to use it all over I had to use half the bottle they sent me. It is a good product but feel the price wouldn't be worth it.

Elemis Pro-Collagen Marine Cream
~ Haven't had a chance to try.

3Lab Cleansing Foam
~ Haven't had a chance to try.

Sweet Spot citrus galbanum
~ These are moistened towelettes for a woman's "sweet Spot" to freshen up at any time. They are handy for sure, they freshen you up with a slight scent of which ever scent you choose.  However a baby wipe will do the same thing. These are just a little more sophisticated. ;-)

I do have my new shipment in for spring and I hope to get you all real reviews on those items, Soon!

BeautyFix.com is seasonal quarterly beauty program in which you pay $50 to sample 8 beauty products from makeup & hair to nails & skincare. The awesome part about this program is that for the $50 I paid for my first shipment I got $400 worth of products. My second shipment was a bit more realistic in regards to how much I paid to the value of products I received. For the $50 I paid for the second shipments I got $134 worth in products. Some of the products are from well-known brands and some of them from brands I have never heard of. Since I started this program in the Fall, some of the brands I had never heard of are now on my favorite beauty store's shelves.

Thanks for reading

Your American Cutie
Jamie Fox

Thursday, March 24, 2011

Luminess Air

Luminess Airbrushing System
$299.90 us 
 

I have been a bad blogger lately. I am sorry, will you forgive me?


I have been spending my time wisely! I have tried a couple new products that I am super happy to share with all of you! The first one I am so excited to share with you all The Luminess Air Airbrush System. I have wanted to try out an airbrushing system since I had the CHANCE to win one at the Glaminar I went to in December. (Which I didn't) So when Makeup Talk, a beauty community that allows you to meet new people, share reviews, and join in discussions on their talk forum had a contest for bloggers to win one, I put a LOT of time into winning one of them! And hot damn, I won one! So after about a week of posting and tweeting EVERYDAY I was chosen randomly as one of the two winners of a Luminess Airbrushing System. I couldn't be more thankful to Makeup Talk and Luminess Air for having this contest. THANK YOU!

Luminess was super fast on shipping it out, I got it about a week after I was announced as a winner. They have five systems to choose from. I received the iLuminess for TV system (1 speed). This system retails for $299.90 and the makeup kit included retails at $80 (if they sold it separately). The entire package that was sent to me came neatly packed and included a stylish silver case to house the compact compressor and stylus while in use and during storage, an empty bottle with directions for mixing a cleaning solution of alcohol and water for the stylus. An AC adapter, (It is battery capable as well,) an informational DVD and Getting started booklet. A starter makeup kit that included one of each of the following in .25 fl. oz bottles. Moisturizer & primer, G-1 Brightening glow, Blush, Bronzer, and four different color foundations. I chose the Medium Matte formula so I got numbers 3-6.


They make using the Airbrush system look so easy but it's NOT! Ha ha ha. Just holding the stylus is a challenge. Luckily, I play several musical instruments so this instrument was no different and was able to manipulate my digits to hold it correctly and comfortably. The biggest challenge I have run into is applying the proper pressure to the trigger. The first time I tried to work with it, the foundation was being spit out in spurts. At first I thought it was broken... then I thought, maybe I was pulling back too much on the trigger... then I took the damned thing apart! Ha ha ha. I like understanding my instruments inside and out, and taking it apart was the smartest thing I did. After taking it apart and playing with all the mechanics of it I put it back together with a better understanding of how the trigger works, how the flow of the make up is compromised by the needle, and the tension needed to make it all work. Anyone that gets an airbrushing system, take it apart CAREFULLY and learn how it works first, unless you are uncomfortable with doing things like that yourself. However, eventually you will need to disassemble it to clean the needle off so you might as well know how the thing looks clean, so you can keep it clean!

The airbrush system takes a combination of pressure, distance, and patience. Eventually it will be faster than applying traditional foundation but take your time while learning. Learning how to cover blemishes and get an even coverage will take more than one time to prefect, so don't give up after the first time. Light pressure on the trigger to bring it back, never past the half-way point, (unless cleaning it out) and holding it about 7-10 inches away from your face is kind of like patting your head and rubbing your belly at the same time! ha ha It can be done though! Try it on a sheet of paper first, this will also allow you to see what the coverage is on a white background. When applying to my face it seemed as though it wasn't covering anything till I put my stylus to paper! Done right you will layer very thin layers of makeup to achieve your look, so make sure to cover blemishes first by using a lighter color than your foundation and hold the stylus about 3-4 inches away from your face. Now unless you have almost flawless skin you are going to need a bit of makeup in the stylus. I used probably 12-16 drops in the machine, but got a thicker than desired finish. So with that said 8-10 drops will be good to cover the entire face for the average non-perfect skin. Blemishes depending, can be about 2-5 drops. For blush I found that 4 drops was perfect for both cheeks and 3 drops of bronzer covered the common highlighting areas since it is so pigmented, on the face and I also used it as eyeshadow to boot!

They have two different formulas to choose from. Satin and Matte. The satin formula is for dryer skin. This is what they recommend for everyday wear to give you a dewy, ultra light weight finish. If you have oily skin like me then the Matte finish is more for you. Better coverage with the matte finish and oil controlling properties that last up to 50 hours. Yes, 50 hours! I don't know about that since I am not going to stay up for 50 hours straight or sleep in it to find out. ha ha. Their matte foundation formula, which is what I received is nice, its a little thinner than I was expecting, it is weightless when dry, even after I over sprayed my face it was like I had nothing on still. You do not have to set it with powder , but they do recommend it to help the length of wear. You can use their translucent powder which is formulated to work with the foundation or any other translucent powder will do.Their colors are numbered like most but Luminess has given even numbers pink undertones and odd numbers a yellow-olive undertone, so what ever color your skin is as long as you pick your color range correctly you will have no problem matching your skin to a foundation.


Their Moisturizer & primer takes nothing to apply 2 drops and 5 seconds takes care of the thin layer needed. I can't tell yet how moisturizing it is but from my experiences so far it doesn't make my face oily!

3 drops of the G-1 Brightening glow is supposed to give you a light shimmery-esk highlighter you would use as your highlighter for the high planes of your face. (cheekbones, nose, chin) anywhere else you want accented. I couldn't tell if it was really working too well so I layered it on a little thick. I am still on the fence with this item. It gave a slight glow but I will pass on this one next time.

The Blush gave my cheeks a very natural pink glow and complimented my skin tone very well. It was easy to get a slight glow to my cheeks and with a little layering I was able to achieve a great pink color on my cheeks.

The bronzer was amazing! The sun-kissed glow it gave to my face and it's use as an eyeshadow worked really well! It is super shimmery and lost none of it's shimmer after a couple hours. I was very pleased with both usage results.

None of the products dried out my face, but dried to a great finish. Their products are a little on the expensive side, so I will probably try out MAC's airbrushing colors and foundations the next time I hit the Pro Store. Plus I get them right away, unlike Luminess which from what I can tell is by mail only. There are so many products out there I want to try a good amount of them to see which is suited for me. For now the Luminess ones will work great for learning how to refine the talent!


Just a side note,  the pictures come across with perfect color and match, but IRL the makeup was a bit dark on me and was noticeable.

I hope this was helpful. I enjoyed writing it for you all!
Love and Airbrushing
Jamie!